Building a reliable PIR Sensor with ESPHome and Panasonic PIR
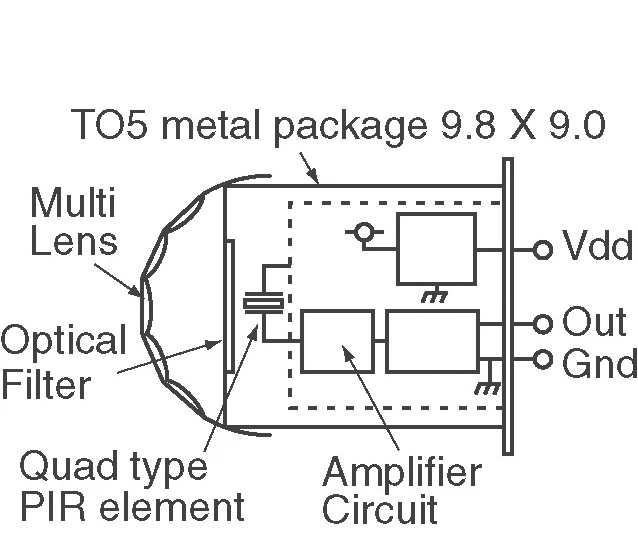
This guide explains how to build a pir sensor with a highly reliable Panasonic PIR sensors.
This is an example sensor used throughout this guide:{:target="_blank"}
Note: Make sure you use 3.3V input on the PaPir, in order to avoid damage to the D1 Mini
Components Needed
- D1 Mini, or any ESP8266 Chip/Board
- Panasonic PIR
- Power Supply (any HLK or a mobile charger)
Panasonic PIR


Steps
Powering your Sensor
- Use either 5V or 3.3V connectors with D1 Mini
- With a D1 Mini, it is recomended to power the system through D1 Mini's USB port.
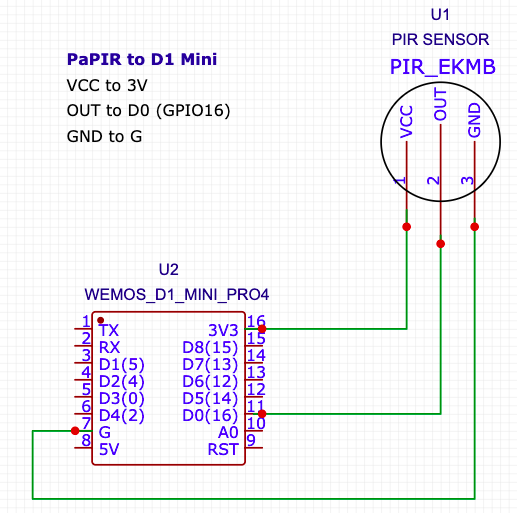
- Connect the PaPIR only from 3V (from the D1 Mini), so that its output signal will remain within the 3V tolerance
Connecting the Sensor
- Connect the output pin of PaPIR to D0 of the ESP8266, or D1 Mini - this instruction is specific to ESP8266
- Connect the VCC on the PIR to 3.3V of D1 Mini or another 3.3V power source if you have available
- Connect the GND pin of the PIR to G

ESPHome Configuration
- This configuration makes use of the pinmode
INPUT_PULLDOWN_16, which is a special pulldown mode used with D0 (GPIO16) on ESP8266 chips. - The configuration adds a 20 second delay in reporting a clear since for usability purposes. You can delete this, increase, or decrease the delay as per your needs
ESPHome YAML
binary_sensor:
  - platform: gpio
    id: my_motion
    name: "Panasonic Motion Sensor"
    pin:
      number: 16
      inverted: false
      mode: INPUT_PULLDOWN_16
    device_class: motion
    filters:
      - delayed_off: 20s
Trouble Shooting
- The Panasonic PIR Sensor implementation is pretty straight forward
- If you have problems connecting with the sensor, double check connections and pins.
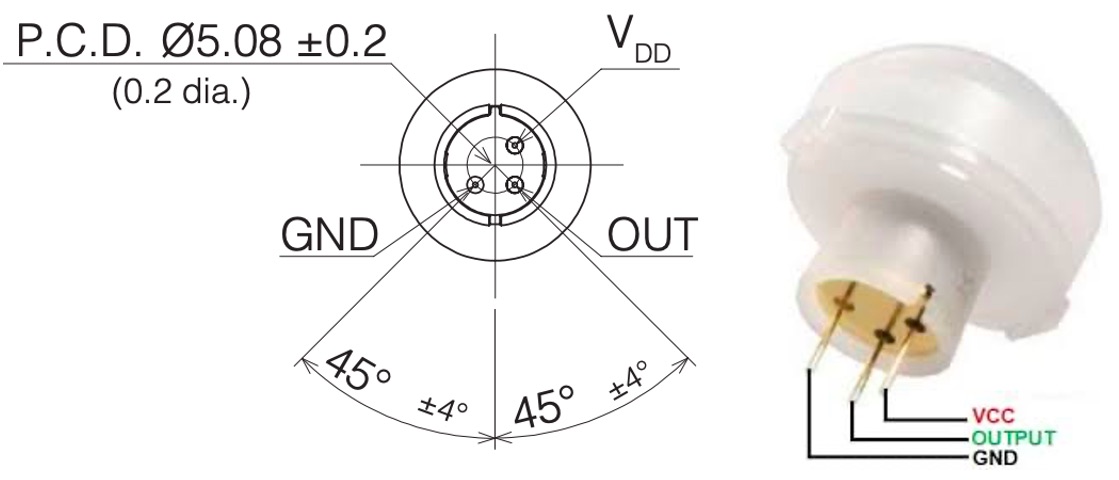
- Sensor pin with plated or covered/sealed base is GND
- Double check if Sensor's VCC and Signal/OUT is switched
INPUT_PULLDOWN_16only works with GPIO16, or D0